
When the sky is gray and rain drops are falling outside your window, there’s nothing better than curling up with a cozy blanket and enjoying a warm meal that warms both body and soul. Dinners for Rainy Days can transform an otherwise gloomy evening into something special. Whether you’re cooking alone or sharing the experience with loved ones, these meals bring comfort in their simplicity and warmth.
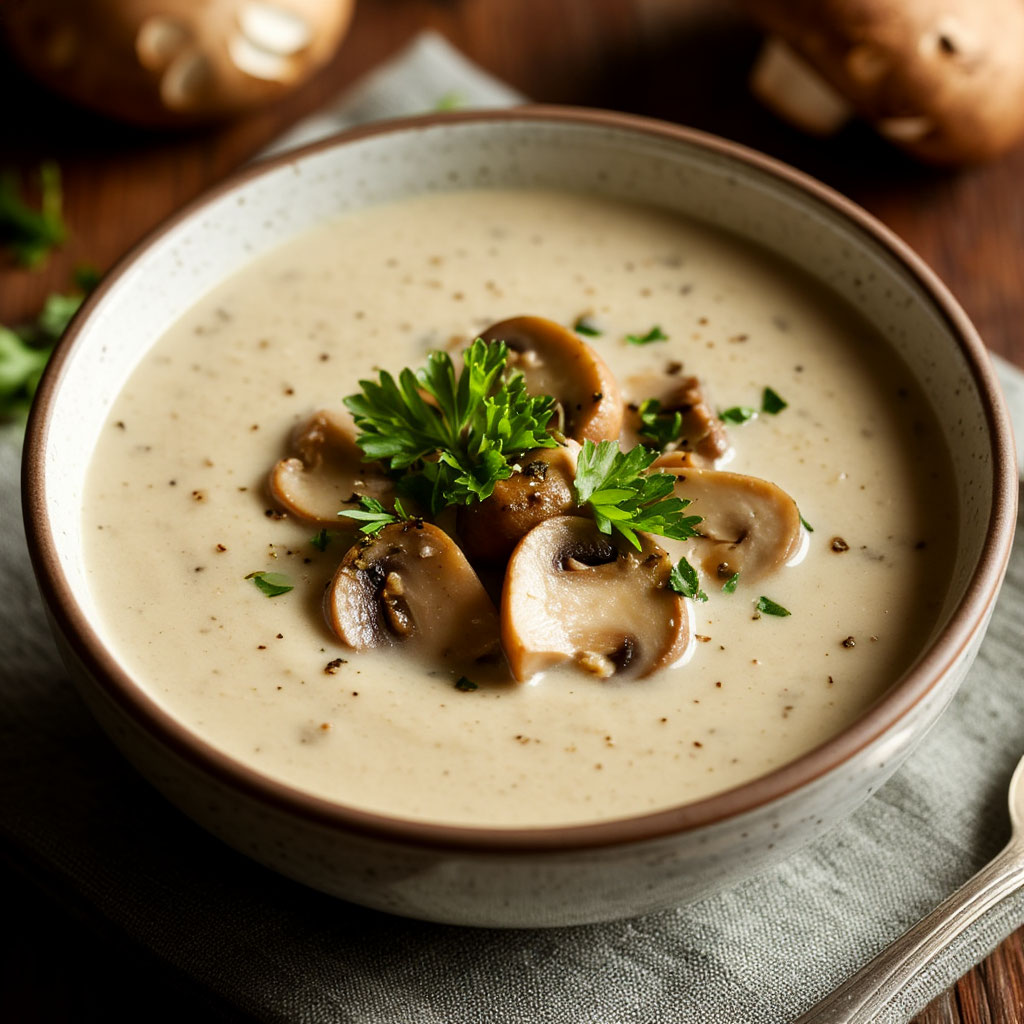
Step-by-step Guide to Making the Perfect Cream Soup with Porcini Mushrooms
We Present a Detailed Recipe for a Cream Soup Made with Porcini Mushrooms—a Delicious Option for a Rainy Day Meal. Its Gentle Forest Aroma Enriched with Smooth Creaminess Makes This Dish Special, Perfect for Ending a Hard Workday or Starting a Friendly Gathering.
Ingredients Needed
- Dried or Fresh Porcini Mushrooms—200 grams (about two medium-sized mushroom caps);
- Fatty Milk or 20% Cream—300 milliliters;
- Medium-Sized White Onion—one piece;
- Unsalted Butter—50 grams;
- High-Grade Wheat Flour—2 tablespoons;
- Rich Consistency Sour Cream—2–3 tablespoons;
- Wholemeal Bread—several thin slices for croutons;
- Hard Cheese (such as parmesan)—50 grams;
- Ground Nutmeg—half teaspoon;
- Black Ground Pepper,
- Cooking Salt—to taste.
Cooking Steps
Step 1: Preparing the Mushrooms
If Using Dried Mushrooms, Soak Them Overnight in Cold Water. In the Morning, Strain Out the Liquid, Rinse Thoroughly, and Cut Into Small Cubes or Strips. If You’re Using Fresh Mushrooms, Simply Wash and Chop Them Similarly.
Step 2: Sauteeing Onions and Mushrooms
Heat Up a Pan on Medium-high Heat, Add Half of the Butter, and Quickly Saute the Ring-Cut Onion Until Translucent. Then Add Prepared Mushrooms and Continue Cooking Another Four to Six Minutes Until a Distinct Mushroom Aroma Appears.
Step 3: Creating the Base of the Soup
Transfer the Onions and Mushrooms to a Suitable Pot, Pour Hot Milk or Cream, Bring to Boiling Point, and Simmer Over Low Heat for Ten to Twelve Minutes While Stirring Regularly to Prevent Lumps Forming.
Step 4: Adding Thickness
On a Separate Clean Pan, Melt Remaining Butter, Sprinkle Sifted Flour, and Heat Continuously Whisking until the Mix Starts Smelling Like Fried Dough. Slowly Pour One-third of the Milk-Mushroom Blend, Vigorously Whipping With a Wire Whisk to Achieve Desired Texture. Return This Flour-Based Mixture Back to the Main Pot and Stir Well Again.
Step 5: Final Processing
Return the Soup to Low Heat and Cook for Eight to Ten More Minutes, Occasionally Stirring. Just Before Finishing, Add Sour Cream, Nutmeg, Salt, and Black Pepper According to Taste. Remove From Heat Immediately Afterward.
Step 6: Decoration and Presentation
While the Soup Is Resting, Prepare Aromatic Croutons. Spread a Thin Layer of Butter on Bread Slices, Sprinkle with Salt and a Little Dry Thyme. Toast the Bread Either in the Oven or on a Dry Pan Until Golden Brown. Top the Ready Croutons with Small Chunks of Hard Cheese.
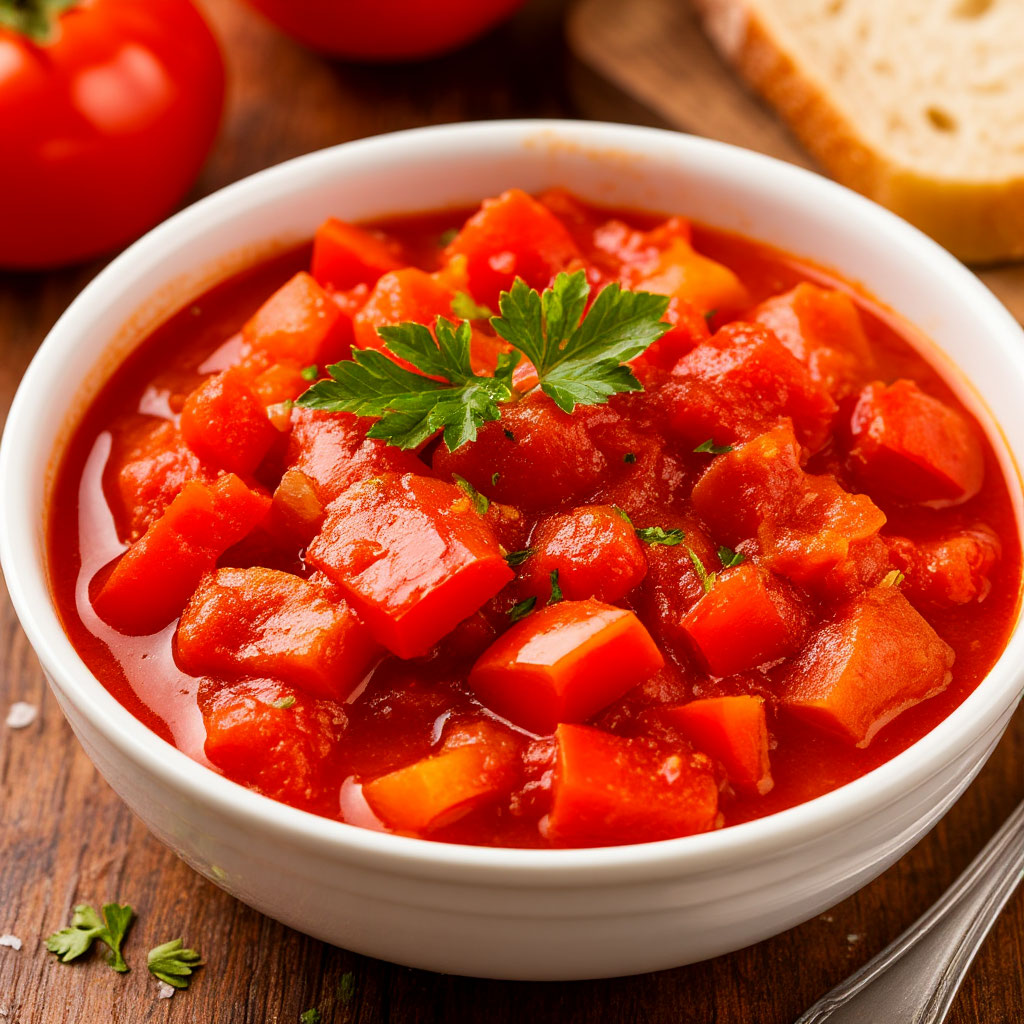
Tomato Goulash with Bell Peppers and Ham
Let’s continue our list of cozy recipes for rainy weather with a dish that will enrich your body with vitamins and simultaneously deliver the warm feelings of a home-cooked meal. Our next guest is Hungarian goulash reinterpreted with zesty ingredients and bright flavors. Bon appétit!
Ingredients
- Pork or veal fillet — 500 grams;
- Ham — 150 grams;
- Sweet bell pepper — 2 pieces;
- Yellow onion — 1 big bulb;
- Carrot — 1 medium size;
- Tomatoes canned in juice — 400 grams;
- Paprika powder (sweet variety) — 1 tsp;
- Black ground pepper — a pinch;
- Bay leaves — 1–2 pieces;
- Olive oil — 2 tbsp;
- Boiled water — 1 cup;
- Coarse salt — to taste;
- Fresh parsley — for garnish.
Instructions
Stage 1: Preparation
Before starting, gather all necessary ingredients. Rinse meat with cold water and pat dry with paper towels. Cut pork into small cubes approximately 2×2 cm in size. Do the same with ham, slicing it into thin strips measuring roughly 3 cm in length.
Clean bell peppers, removing seeds and membranes, chopping them into one-centimeter-thick wedges. Slice onions into half-rings and grate carrots using a medium-size grater.
Strain tomatoes from the jar onto a colander, letting liquid drain away while retaining tomato pulp.
Stage 2: Meat and Onion Frying
Heat a heavy-bottomed pan over moderate heat. Pour in two tablespoons of oil and let it heat thoroughly. Spread cubed meat evenly across the bottom of the pan, lightly seasoning with salt and black pepper.
Cook the meat, stirring occasionally, until a nice golden crust forms. Typically, this takes five to eight minutes. Reduce heat to minimum and cover with a lid to finish cooking.
Stage 3: Vegetables
Meanwhile, use another pan or sauté pan and preheat it. Add one spoonful of vegetable oil and begin by putting prepared vegetables inside: start with onions, followed by carrots, and finally bell peppers. Sprinkle everything with half a teaspoon of coarse salt and stir every three minutes to avoid burning.
Cook vegetables until tender but ensure that the peppers retain their shape and firmness.
Stage 4: Assembling the Goulash
Take a wide pot or deep iron skillet. First transfer cooked meat chunks into it, spreading them evenly. Next, arrange roasted vegetables on top. Follow with preserved tomato pulp, adding more salt, black pepper, and bay leaves.
Now carefully dissolve one tablespoon of flour in a cup of room temperature boiled water and pour it slowly into the middle of the goulash, gently mixing contents with a wooden spatula.
Cover the pot and leave it to simmer over low heat for approximately twenty minutes, checking periodically for doneness.
Stage 5: Final Touch-ups
Just before serving, remove the lid, discard bay leaves, and check the flavor of the goulash. Feel free to adjust seasoning by adding several drops of lemon juice or freshly ground black pepper for enhanced flavor.
Before presenting, garnish the dish with fresh parsley sprigs, giving it a beautiful look and preserving product freshness.
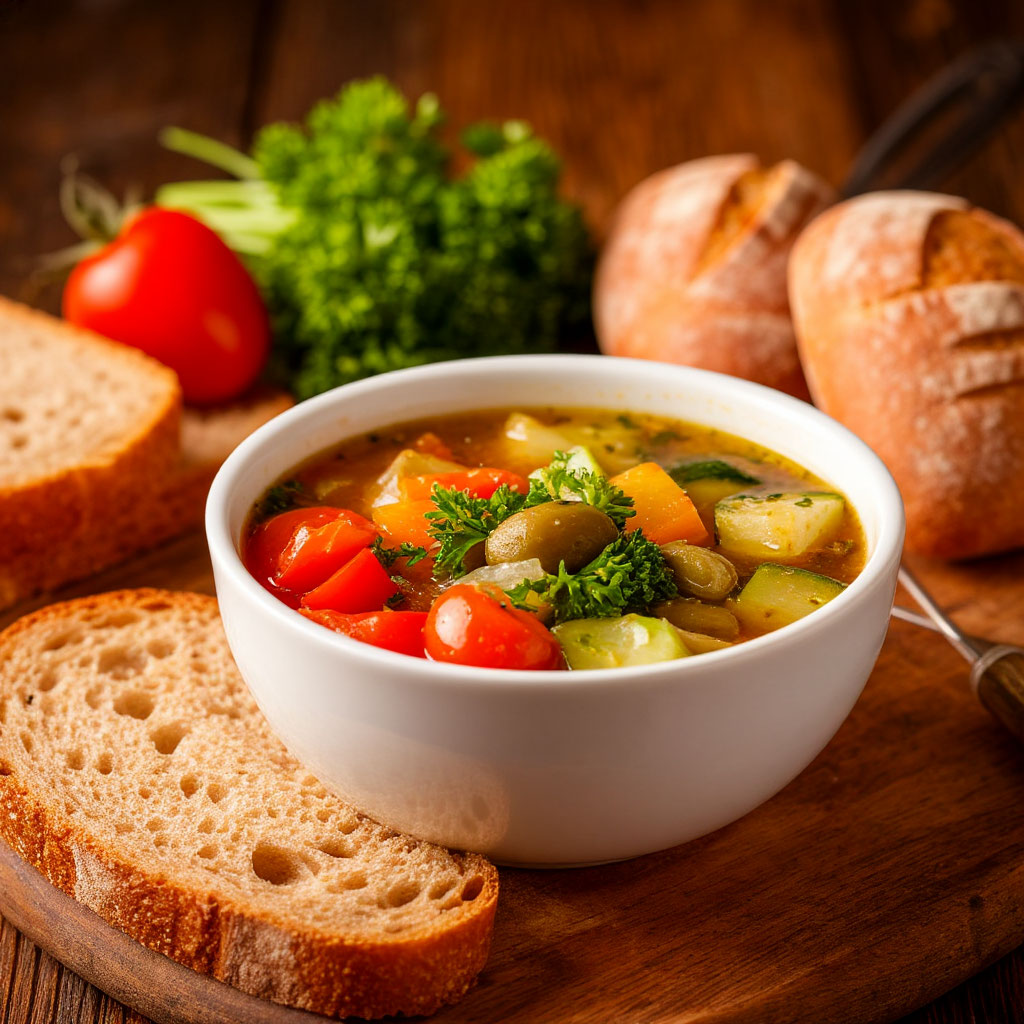
Veggie & Bread Fondue
Our third comfort food recipe pays tribute to a classic Swiss dish — fondue. This idea was born among Alpine villagers who needed a way to repurpose leftover cheese and bread from previous meals. Today, fondue has evolved into a popular symbol of convivial gatherings and celebrations. We’ll walk you through a straightforward and accessible recipe for preparing cheese fondue, which will undoubtedly delight you and your guests.
Required Ingredients
- Firm cheeses (Emmentaler, Gouda, Cheddar) — 300–400 grams;
- Dry white wine — 200 ml;
- Lemon juice — 1 tablespoon;
- Cornstarch — 1 tablespoon;
- All-purpose wheat flour — 1 tablespoon;
- Baguette or sliced bread loaf;
- Cherry tomatoes, cucumbers, celery stalks, broccoli florets (for dipping vegetables).
Preparation Instructions
Step 1: Choosing the Right Cheeses
First, select appropriate cheeses. Combining flavors and textures is important here. Emmentaler and Gouda are great choices for beginners, whereas experienced enthusiasts may prefer more exotic varieties like Appenzeller or Gran Cruden. Grate the cheese on a large-hole grater, since finely grated cheese melts faster.
Step 2: Preparing Other Components
For optimal results, add lemon juice to prevent the cheese from curdling upon heating. Combine one tablespoon of cornstarch with a small amount of flour to facilitate melting and achieve desired consistency.
Step 3: The Process of Preparation
Start by warming the white wine in a small saucepan. Before introducing the cheese, verify that the wine is heated but hasn’t reached boiling point.
Gradually incorporate the grated cheese, constantly stirring to ensure smooth blending. Keep heating until the mixture achieves uniform consistency.
Continuously stir with a wooden spoon or whisk to prevent clump formation.
Once the mass reaches a silky structure, reduce the heat to the lowest level possible and maintain steady warmth.
Serve the finished fondue directly in a specialized caquelon dish intended for fondue service, or transfer it to a suitable ceramic container positioned above a small flame to keep it warm.
Step 4: Selecting Accompaniments
Classic accompaniments typically include baguettes or traditional Swiss bread baked the day before. Slice the bread into manageable portions and dip them into the molten cheese.
Vegetables cut into batons or smaller pieces are equally acceptable options. For instance, cherry tomatoes, sliced cucumbers, celery stalks, and broccoli florets pair excellently with cheese fondue.
How to Serve Fondue?
It is recommended to serve the fondue on a separate plate surrounded by bread slices and vegetable selections. Guests receive long-handled forks specifically designed for conveniently spearing food and dunking it into the warm cheese mixture.
For added entertainment, organize competitions like “Who Can Eat Fastest?” or engage in storytelling sessions and anecdote exchanges with family members.
Meat-and-Potato Pie (“Shepherd’s Pie”)
Another dish in our collection of rainy-day recipes is the famous British Shepherd’s Pie, known for its simplicity and immense popularity. This creation combines layers of meat and potatoes topped with a luxurious mashed potato coating. Through this recipe, we’ll discover authentic English flavors and learn how to craft a delicious pie that will win hearts in any household.

What Ingredients Are Necessary?
Here is the primary set of ingredients required for making a classic shepherd’s pie:
- Lamb or beef mincemeat — 500 grams;
- Large potatoes — 6–8 tubers;
- Medium-sized yellow onion — 1 piece;
- Medium carrots — 2 pieces;
- Canned green peas — 1 tin (~200 grams);
- Red sauce (tomato paste diluted with water) — 1 cup;
- Butter — 50 grams;
- Egg — 1 unit;
- Milk or cream — 100 ml;
- Spices: salt, black pepper, marjoram, thyme, garlic powder;
- Breadcrumbs or grated cheese for garnishing.
Preparation Steps
Step 1: Preparing the Minced Meat
You can buy ready-made mincemeat or grind the chosen type of meat yourself. Best suited are young lamb or lean beef cuts. Enhancing the flavor, add finely diced onion and preferred spices to the mincemeat.
Step 2: Making the Filling
In a large deep frying pan, heat a small amount of oil and fry the minced meat until it turns brown. Then add coarsely chopped onion and carrots, and braise them over medium heat until the vegetables soften. Later, introduce tomato paste mixed with boiling water, and simmer the mixture until it reaches the desired thickness.
Season with salt, black pepper, and a pinch of dried herbs (thyme, marjoram), then switch off the heat. Allow the filling to cool completely.
Step 3: Working with Potatoes
Peel the potatoes, slice them into larger pieces, and boil them in salted water until fully cooked. Once done, strain the water, then add butter, egg, and warm milk. Mash the potatoes well, avoiding lumps, until achieving a smooth puree texture. For better taste and texture, optionally add a touch of grated cheese.
Step 4: Assembling the Pie
Grease a baking dish with butter or line it with parchment paper. Start by laying down the prepared meat filling evenly across the base of the dish. Then apply a consistent layer of mashed potatoes on top, smoothing it out with a spatula or hands.
For aesthetics, score the upper layer with crisscross lines using the reverse side of a knife. Finally, sprinkle breadcrumbs or grated cheese over the top.
Step 5: Baking
Bake the pie in a preheated oven at 180°C for about 30–40 minutes, until the top acquires a pleasing golden-brown hue.
Check readiness by pressing gently on the surface: a fully baked pie should bounce back and have an attractive exterior appearance.
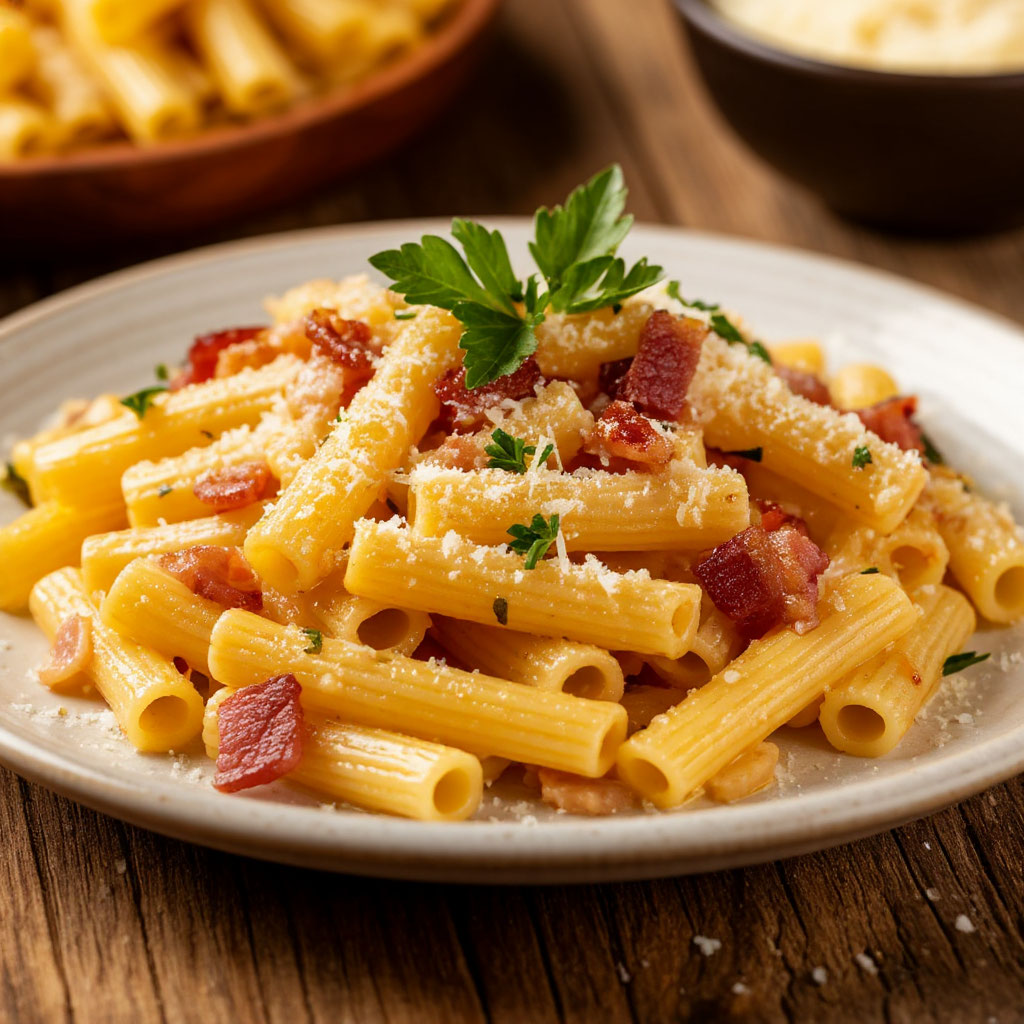
Pasta with Cheese and Bacon
Let’s conclude our selection of “Dinners for Rainy Days” with a renowned Italian dish—pasta with cheese and bacon (Pasta alla Carbonara). Simple to prepare, packed with protein and complex carbohydrates, it instantly boosts your mood on a cold, rainy day. Below is a step-by-step guide to creating the perfect pasta carbonara.
List of Ingredients
We’ll follow the most common version of the recipe, requiring minimal components yet delivering exceptional flavor:
- Spaghetti or linguine — 200 grams;
- Chicken bacon or pancetta — 150 grams;
- Eggs — 2 pieces;
- Parmigiano Reggiano or Grana Padano cheese — 100 grams;
- Kosher salt — to taste;
- Freshly ground black pepper — to taste;
- A small amount of olive oil (optional).
Preparation Instructions
Step 1: Preparing Primary Ingredients
Begin by separating the main components of the dish. Take a deep bowl and break two eggs into it, separating yolks from whites. Set aside the yolks and dispose of or freeze the whites for future use. Grate the cheese into a small bowl, preferably using freshly-cut cheese to enhance the aroma.
Next, handle the bacon: slice it into narrow strips, approximately one centimeter wide. Set aside temporarily to proceed with subsequent stages.
Step 2: Cooking the Pasta
Measure the correct quantity of water, bring it to a rolling boil, and add a pinch of salt. Drop the spaghetti into the boiling water and cook strictly according to manufacturer instructions, reducing the suggested cooking time by one or two minutes because the pasta should remain slightly firm internally.
Monitor the condition of the pasta regularly during boiling, testing for doneness frequently.
Step 3: Handling the Bacon
In a large skillet, heat a small amount of olive oil and place the sliced bacon inside. Fry on medium heat until the bacon acquires a golden-brown color and crunchy texture. Periodically shake the pan to ensure even browning.
When the bacon reaches the desired state, remove it from the pan and set aside. Save the rendered fat for the next step.
Step 4: Creating the Cream Sauce
Pour the reserved egg yolks and grated cheese into a deep bowl. Beat the mixture vigorously with a wire whisk until homogeneous. This resulting sauce will act as the basis for further pasta treatment.
Note that it’s crucial to maintain the proper ratio between egg yolks and cheese; otherwise, the final dish risks becoming too salty or watery.
Step 5: Bringing Everything Together
After draining the cooked pasta, reserve a few ladles of cooking liquid for later use. Swiftly transfer the spaghetti into the skillet containing the remaining bacon fat, quickly stirring to coat each strand.
Then promptly add the bacon, egg-yolk mixture, and a portion of the reserved cooking liquid, energetically stirring upward motions. Exercise caution to avoid overcooking the mixture and causing the egg proteins to scramble.
Continue stirring until the pasta gains a glossy texture and is uniformly covered with the creamy sauce. Stop the cooking process immediately afterward.
Step 6: Finishing the Dish
Transfer the pasta onto serving plates, generously dusting with freshly ground black pepper and an additional portion of grated cheese. Thus, you obtain a beautiful, fragrant, and tempting dish worthy of being called a pride of Italian cuisine.
These recipes aren’t exclusively meant for gloomy Sunday nights but suit any occasion when craving a cozy evening at home. Turn the preparation of “Dinners for Rainy Days” into a joyous event by inviting friends or family to share a heartwarming meal and discuss the events of the day. Nothing brings people closer than sharing a peaceful meal at home.